- Home
- Learn Linux
- Learn Electronics
- Raspberry Pi
- Programming
- Projects
- LPI certification
- News & Reviews

Google Ads
26 November 2013
The Raspberry Pi is a low cost, low power computer ideal for learning computing and electronics projects.
It is available in a model B which is the most popular version with 512Mb ram, two USB ports and built in Ethernet, or as a model A which is a "lite" version with only 256Mb ram, one USB port and no networking.
Whilst in most circumstances it's worth paying a little extra for the Model B there are some times when the Model A is a better fit. In particular the model A uses less power so is good as a battery powered computer.
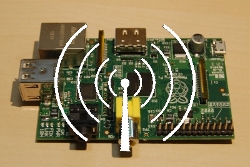
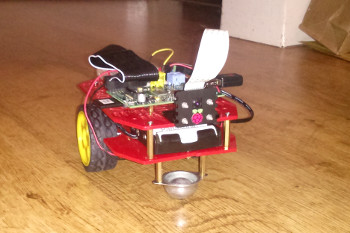
I've recently been looking at using a Raspberry Pi in a robot. The model A is a great fit as it uses less power and the on-board Ethernet is not much use for a robot that is better on wireless provided through a USB WiFi dongle. One disadvantage is that the Raspberry Pi model A has only one USB socket, so if you want to connect multiple usb peripherals (eg. a keyboard and a USB wireless dongle) at the same time then you need a USB hub. This guide is for those without a USB hub who would like to be able to configure wireless networking with only one USB slot. It can also be used as a guide to configure a wireless network connection for those that prefer to use the command line rather than the network manager in the GUI environment.
Note that this is to configure the Raspberry Pi onto an existing network such as your home WiFi network. If you would rather configure your Raspberry Pi as a WiFi hotspot then more details will be provided in a future post.
Before we start then ideally we need to know of a static IP address that can be used. To do this officially you will need a good understanding of networking and to to delve into your wireless router settings. If you know how to find your routers DHCP and find an IP address outside of that range (or shrink the range as required) then I strongly recommend you do so. If not then you will can let your router provide an IP address (using DHCP) on and read the IP address from the first time it runs, but depending upon the lease time you may need to check the IP address each time that you reconnect to the network as it may change.
This is based on the NOOBS SD card which is a pre-imaged card for the Raspberry Pi complete with several distributions. The distribution installed is the recommended Raspbian Linux distribution (based on Debian Wheezy). The Raspbian image is pre-configured with wireless networking enabled, however it uses a dynamic IP address whereas I needed a static one and as my wireless network is encrypted (like most home networks) then I also need to be able to add the WAP information.
If using the command line there is no need to have the wireless dongle attached yet. Instead connect a USB keyboard to the USB port and choose Raspbian from the NOOBS install screen. Once it has installed the image and you've rebooted we can start the configuration of our wireless network so that it is available once the WiFi dongle is connected. Alternatively if you can purchase a USB to TTL serial adapter that can be used to configure the Raspberry Pi using the GPIO ports (more about this in a future post).
Without a keyboard the configuration is easiest achieved using the command line (text based screen) rather than starting the Desktop. During first install you are presented with the raspi-config window. If you are not using a UK keyboard then you may need to change the keyboard settings in the "Internationalisation Options". Don't change the ssh server setting (now under advanced options) as we will need to use ssh to connect to the Pi once the wireless is working.
You should now be able to login using the normal username and password and will be left looking at a prompt
pi@RaspberryPi ~ $
Most people starting on the command line will use the nano editor which is the one that I'll use below. It is run by entering nano followed by the name of the file you want to edit. As we need to change some system files I have prefixed the commands with sudo to run with "superuser" privileges.
The first file is the interfaces file which describes the different network interfaces and how they will obtain their IP addresses.
If you are sticking with DHCP then there is no need to change this, but if you are changing to a static IP address which is recommended then this should be changed as below.
sudo nano /etc/network/interfaces
once in the file delete the line
iface default inet dhcp
and replace with the following (changing to your own IP static IP address and gateway address)
iface wlan0 inet static
        address 192.168.0.51
        netmask 255.255.255.0
        gateway 192.168.0.1
Also change the wpa-roam entry to be wpa-conf
(wpa-roam is used when you change wireless network so only works in dhcp or manual modes)
so it should now say:
wpa-conf /etc/wpa_supplicant/wpa_supplicant.confnano /etc/wpa_supplicant/wpa_supplicant.conf
add your networks security information (replace networkssid with the SSID of your network and network-passphrase with the passphrase). If at their default then these are normally on a sticker on the back of the router.
network={
    ssid="networkssid"
    psk="network-passphrase"
}sudo halt
Swap the keyboard USB connector for the wireless USB dongle and reboot.
Keep your fingers crossed (optional) and with any luck the network connection will now work and you can connect to the Raspberry Pi using ssh.
If you are letting your router decide the IP address using DHCP then you will need to note down the address shown on the screen (the last thing before the login prompt) so that you can connect using ssh.

