- Home
- Learn Linux
- Learn Electronics
- Raspberry Pi
- Programming
- Projects
- LPI certification
- News & Reviews

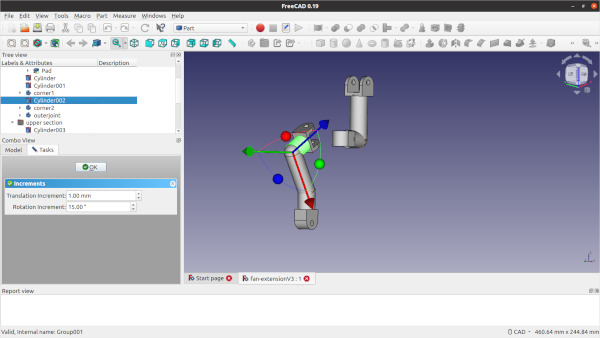
Keep yourself perfectly chilled with this custom 3D design project! We are using FreeCAD to design a fully articulating, adjustable arm for a cooling fan. This guide will walk you through the process of creating functional, moving parts from scratch. You'll learn how to model friction joints, design custom mounting brackets, and engineer an assembly that is optimized for 3D printing.
FreeCAD is an open source 3D design program available for Linux and Windows. It is a 3D parametric modeller, which means that models are designed by adding constraints that determine the relationship between shapes and dimensions. This can make it difficult for beginners faced with a steep learning curve to learn the concept before they can put it into practice. I've already created a beginner video, but I found there were not many videos that explain the next step of how to create more complex models from multiple parts.
You can see my earlier video: Beginners FreeCAD tutorials, or my other 3D printer / CAD projects.
I've therefore created this follow-on video based around using the FreeCAD Part Workbench
Due to a heatwave in the UK I've been trying to find a suitable fan to cool my son. I found a small clip-on fan, but it has limited movement so I couldn't position it where I wanted to. I therefore designed an extension arm. I created it as a two part arm so as to also provide additional adjustment.
In my first attempt I made the arm using just the part design workbench. This was easy enough to design but I realised I'd made the arm too big and so it wasn't very stable. I tried to modify my existing design, but making adjustments broke other bits of the design and broke the overall CAD model.
I then experimented using the Part workbench, creating the arm from different bodies and also using the simple 3D shapes such as the cylinder. I discovered how it makes the design easier and made it so that it could be adjusted afterwards. I show these in the video demonstrating how I could adjust the angle of the parts easier than when it was created as a single body. Once you understand it, it is actually a much easier and more natural way to design parts.
I also created groups for the bodies which made selecting them easier and made it easier to export ready for 3D printing.
See my other FreeCAD tutorials:
There are more guides to creating 3D models and use of a 3D printer at Penguintutor 3D design and 3D print projects
Also see:
To see future updates please:
Subscribe to the PenguinTutor YouTube Channel
Please view the copyright information regarding use of the circuits.