- Home
- Learn Linux
- Learn Electronics
- Raspberry Pi
- Programming
- Projects
- LPI certification
- News & Reviews


In this tutorial you will learn how to create a first 3D model in TinkerCAD.
TinkerCAD is an online 3D design tool. It works well in both Firefox and Chrome (Chromium) on Linux. It is closer to a professional Computer Aided Design tool compared to Blender (which is more of a modelling tool).
TinkerCAD is very easy to use, and in my opinion one of the easiest to get started with. It is still possible to create some complex designs. TinkerCAD has some restrictions in what it can create. In particular there is a restriction in the size of model that can be created, restricted approximately to the same size as most 3D printers. If you need to create models larger then those then may need to be scaled down, subdivided into smaller models or use a more professional tool.
This is a simple video of getting started in TinkerCAD and creating a simple wall to 3D print for a G-Scale model railway.
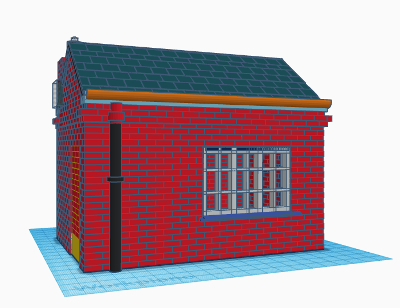
Eventually this can involve into a more complex building such as the one shown below. This is a G-Scale Model Railway Weigh Bridge Office, which has been created in TinkerCAD.

The latest version of the building is now available. Information on how this was created is available at:
There are more guides to creating 3D models and use of a 3D printer at Penguintutor 3D design and 3D print projects
To find out about the updates please:
Subscribe to the PenguinTutor YouTube Channel
and
Follow @penguintutor on Twitter
Please view the copyright information regarding use of the circuits.