- Home
- Learn Linux
- Learn Electronics
- Raspberry Pi
- Programming
- Projects
- LPI certification
- News & Reviews

Google Ads
If you are looking to build your own custom trackside lighting from scratch, this automated LED signal project covers the entire maker workflow. Designed to integrate smoothly with my broader Raspberry Pi layout automation, this build tackles both the physical and electronic design. We will be using FreeCAD to 3D print realistic, G-Scale lineside signals, and KiCAD to design a custom Arduino-based PCB to drive the LEDs. It is a fantastic way to learn how to interface custom lighting hardware with a Raspberry Pi to create a fully automated indoor or outdoor railway.
This is part of my projects on building an indoor (OO Scale) and outdoor (G-Scale) model railway.
This project creates automated LED traffic light signals using custom electronics (based around an Arduino) interfacing with a Raspberry Pi. This can be used in conjunction with the Raspberry Pi Model Railway Automation project and is also compatible with the G-Scale model railway traffic lights used in an earlier project.
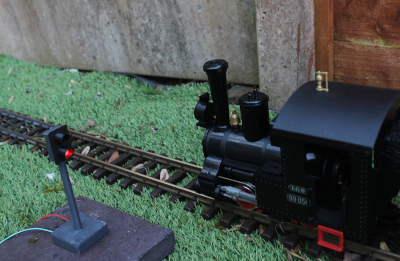
This video shows the printed circuit board and Raspberry Pi automation to control the lineside train signal lights.
See my electronics pages for more details about how the circuit and PCB were designed using KiCAD.
The signal lights are created in FreeCAD. These are based around the same techniques used to create my traffic lights. The signal lights are approximately to G-Scale.
Please Subscribe and click the bell icon to be notified of my future videos.
Also see:
To see future updates please:
Subscribe to the PenguinTutor YouTube Channel
Please view the copyright information regarding use of the circuits.