- Home
- Learn Linux
- Learn Electronics
- Raspberry Pi
- Programming
- Projects
- LPI certification
- News & Reviews

Google Ads
This is the reference guide see the Getting started with Arduino tutorial for details of how to use the Arduino.
 The Arduino is like an electronic hobbyists dream come true. A low cost microprocessor based circuit that can run from USB or an external supply, it is open source and works with Linux. The official description is as follows:
Arduino is an open-source electronics prototyping platform based on flexible, easy-to-use hardware and software. It's intended for artists, designers, hobbyists, and anyone interested in creating interactive objects or environments.
Basically it allows you to create electronic circuits that can be either standalone (once the sketch is downloaded), or can communicate with a PC to act as an interface between the PC and the physical world.
The Arduino can be programmed using the Arduino Programming Language, which is based around C/C++. By using this the arduino board can be programmed as a standalone computer (all be it a very basic one with limited interfaces).
There are serveral versions of the Arduino available. Different Arduino boards can use different form factors, voltages and different architectures.
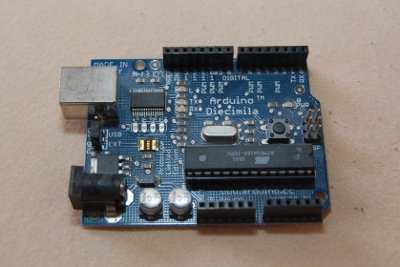
I refer to these as the "classic format". These are ones that follow the traditional format, run at 5V (on the processor) and fit the original Arduino Shields.
The most popular in the classic format is the Arduino Uno. The current Arduino Uno has a ATmega328 processor; whereas the earlier versions of the Arduino used an ATmega168 processor. The other versions are for more specialist needs, such as the Arduino Mega (more ports available), the Lilypad (suitable for sewing into clothing) or smaller versions using SMD components. Unless otherwise stated all further references are to the standard version.
The standard Arduino has 14 digital pins. Some of which have additional functions:
There are also 6 analog inputs each with 10 bits of resolution (0 to 1023).
The Arduino data sheets give some of the information on the characteristics but for the full details you need to look at the datasheet relating to the AVR microprocessor used. The microprocessor depends upon the model of the Arduino, although except for the Leonardo most are based on (or compatible with) the ATmel ATmega328. I've put some of the key points based on a typical 5v Arduino in the table below, but if you need accurate information you should check the datasheets.
| Recommended input voltage | 7 to 12v |
|---|---|
| Internal voltage (Vcc) | 5v |
| Digital input low voltage | -0.5v to 0.3Vcc -0.5v to 1.5v |
| Digital input high voltage | 0.6Vcc to Vcc+0.5v 3v to 5.5v |
| Digital output low voltage | Max 0.9v (at 20mA) |
| Digital output high voltage | Min 4.2v (at 20mA) |
| DC current per pin | 40mA |
| Total current for block of pins (eg. half of digital outputs) |
150mA 1 |
1 See datasheet for actual pin details
Also varies depending upon function (eg. SPI specification differs from above)
The newer MKR series Arduinos have a smaller form factor and run at a lower voltage of 3.3V. These are electrically compatible with other 3.3V microcontrollers (such as the Raspberry Pi Pico) and the Raspberry Pi System-On-Chip computer.
You can also create your own Arduino Like Circuits if you have a custom requirement. See the following guides for more details.
The Arduino is used in the following projects:
Please view the copyright information regarding use of the circuits.

