- Home
- Learn Linux
- Learn Electronics
- Raspberry Pi
- Programming
- Projects
- LPI certification
- News & Reviews

Google Ads
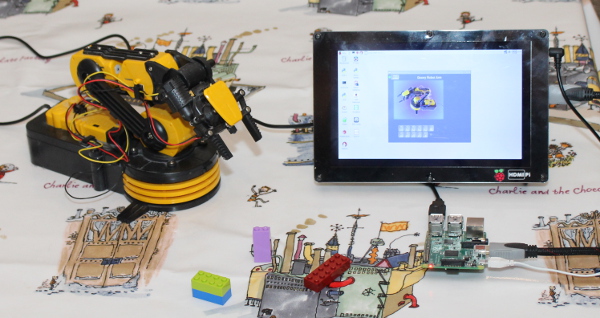
The cebeekit robot arm is a fun educational toy useful for demonstrating how robots work. Unfortunately the arm appears to be out of production, but it may still be available from old stock.
The robot arm comes supplied with software, but that software is only available for Windows, whereas I wanted to use it with a Raspberry Pi. I also understand that the software does not work with recent versions of Windows. Some other people have already written command line software that works with Linux and the Raspberry Pi, but I really wanted a GUI application that made it as easy to use as it is on Windows. I have therefore created the G-Robot arm software which can be used on a Raspberry Pi or other Linux computer.

As you can see from the screenshot the application has control buttons that can be used to control the robot arm. These can be pressed using a mouse, a touchscreen (if you have one) or using keyboard shortcuts. The keyboard shortcuts are the same as those used on the Windows version of the software.
To get started you need:
# When buying a robot arm you need to ensure that you buy the version that includes the USB computer interface (or buy the usb interface separately). Some suppliers may provide a handheld remote control instead.
* The software will also work with other Linux based computers (see later).
These instructions are based on using Python 3 on Raspberry PI OS.
If the program is added to the applications menu then it can be launched by clicking on the appropriate icon. Alternatively he program can run from the terminal. cd to the directory with the application installed. eg:
cd /home/pi/robot-arm/source


./grobota.py

The current version was written prior to the official Raspberry Pi display screen becoming available. It was designed for higher resolution screens and on the touch screen only part of the screen can be displayed. It is possible to move the screen (using <Alt> Mouse Drag) so that the controls are all on the screen. It is hoped to create a different layout in future that will work on smaller screen sizes.
Only major updates are listed, minor updates are tracked through github.
Initial version with the realtime control of the robot arm.
Updates to the install instructions to reflect later versions of Raspberry Pi OS.
As the robot arm is no longer in production then I don't plan to develop this further. I am continuing to offer assistance as appropriate.
I do hope to develop code for a different robot arm in future. If anyone produces a suitable robot arm (suitable for school / education use) that they'd like me to consider then please let me know.
For the latest updates please:
Subscribe to the PenguinTutor YouTube Channel
and
Follow @penguintutor on Twitter
Please view the copyright information regarding use of the circuits.

