- Home
- Learn Linux
- Learn Electronics
- Raspberry Pi
- Programming
- Projects
- LPI certification
- News & Reviews

Google Ads
The Raspberry Pi and Arduino can compliment each other. The Arduino does not have the overhead of running a full operating system so is particularly good at realtime communications, whereas the Raspberry Pi has the advantage of a full operating system and network connectivity. Another useful thing is to use the Arduino to provide additional connectivity if you run out of GPIO ports.
This example uses the USB port which uses UART serial communications. These are generally asynchronous communications sent half-duplex with one side sending at a time. This is similar to RS-232 serial communications that you may have used on older computers, but this uses different voltages and doesn't meet the full RS-232 specification.
This is a guide that I created prior to the above video. This uses the same techniques shown in the previous video, but is a different example of how you can achieve this.
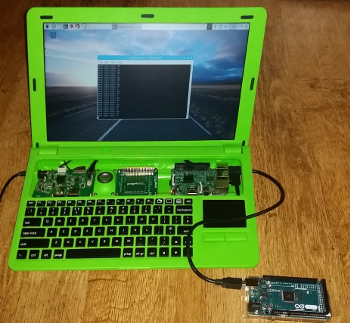
This will explain how the Raspberry Pi and Arduino can communicate together using serial communications over the USB port. This will allow the two to work together in an electronic project. In addition the programming of the Arduino will be performed using the Raspberry Pi so there will be no need for an additional computer.
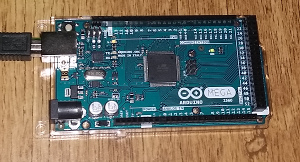
In this example I will be using an Arduino Mega 2560 (which provides 56 digital I/O ports and 16 analog input ports). This should work with any Arduino / Genuino microcontroller boards (which is recommended). If you are using a different manufacturer then you may need to choose a suitable controller or add your own to the Arduino IDE.
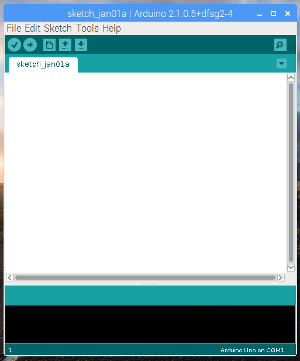
We will start by setting up the Raspberry Pi to allow us to use it to program the Arduino. First install the Arduino IDE by issuing the following command from the terminal.
sudo apt-get install arduino
The IDE can now be found on the application menu under programming and electronics.
You can test that the Raspberry Pi is able to program the Arduino by sending a sample program, such as Blink from the included examples. Clicking the right arrow button the menubar will compile the code and send it to a serial device. First you should select the appropriate model of Arduino from Tools -> Board. You should also select the appropriate Serial Port - which is normally /dev/ttyACM0 (if you are unsure then run dmesg after plugging in the Arduino).
The blink code will flash the onbord LED which is connected to I/O port 13. If the LED is already flashing then you could change the values of the two delay statements and ensure that the speed of the flash of the LED changes appropriately.
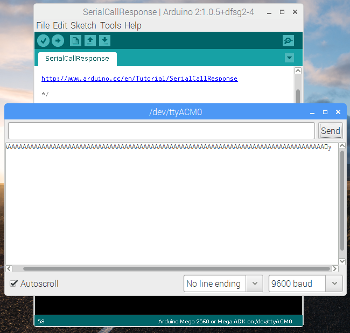
We can first test serial communications with some example code included with the Arduino. Choose SerialCallResponse from the Examples -> Communication menu. Download the code to the Arduino and then start the Serial Monitor. The Arduino should send a series of letter A's to the serial monitor, enter some text in the text box and click Send. The Arduino will send a status code for the state of certain pins and then stop. You will not be able to read the code as it is sent as binary data, as long as you get a response that is sufficient for now.
The code that runs on the Arduino is written in a language based on C/C++. I won't go into detail on the Arduino side, but I've included the code below. If you have done some programming in C before then it should be fairly intuitive, if not then you may need to look for a book or tutorial on C or on the Arduino.
int analogPin = A0;

// Note digital 0 and 1 should not be used as they are required for serial

int outputPin = 2;


int inputValue = 0; // store read value


void setup() {

  pinMode (outputPin, OUTPUT);

  // turn LED on

  digitalWrite(outputPin, HIGH);

  Serial.begin(9600);

  while (!Serial) {

    ;

  }

}


void loop() {

  sendStatus();

  delay(10);


}


void sendStatus() {

  char buffer[50];

  inputValue = analogRead(analogPin);

  sprintf (buffer, "Analog input %d is %d", analogPin, inputValue);

  Serial.println(buffer);

}
This is only fairly basic. It will send the value of the analogue input as a text string. It could be used as the start of something more advanced.
If you scroll to the bottom of the Arduino code you will see the comments include code for the computer side using the Processing language. The Processing language is based on Java which is in some ways similar to C and the IDE for Processing is closely related to the one used by Arduino. Processing is actually a good language for trying out some graphical programming and I will hopefully include some examples using Processing in future, but for now I wanted to make use of existing Python libraries so I'll instead be providing alternative code for Python.
Python incudes a library for communicating with serial devices (including serial over USB that the Arduino uses) called pyserial. I've created some simple code that will look for a signal from the Arduino, print the character received, send back the letter A and then read and print the 3 bytes that the Arduino sends back.
#!/usr/bin/python3


import serial

ser = serial.Serial('/dev/ttyACM0', 9600)


# read from Arduino

input = ser.read()

print ("Read input " + input.decode("utf-8") + " from Arduino")


# write something back

ser.write(b'A')


# read response back from Arduino

for i in range (0,3):

        input = ser.read()

        input_number = ord(input)

        print ("Read input back: " + str(input_number))
The pyserial library is imported under the name serial, and a new serial object created which opens the connection. The device /dev/ttyACM0 is the USB serial port as mentioned previously, this may need to be updated if you have additional serial devices connected, but otherwise should work.
The first serial read is the 'A' characters that the Arduino sends out. Which is then printed on the following line. Note that the string is received as a binary byte which is decoded to text using the UTF-8 codec.
The code then responds with an A, which is sent as a byte.
The code then reads back the next 3 bytes from the Arduino. This time they are binary numbers, so they are stored as a number using the ord function and then cast as a string using str.
To test properly involves adding a small circuit to the Arduino, but for the purpose of testing then it works without. Also note that there is no error checking in this code.
To run this code save it as a file on the Raspberry Pi called serial-test.py
Set appropriate permissions using:
chmod +x serial-test.py
and then run using
./serial-test.py
You may also need to press the reset button on the Arduino to start it running again, as we need it to restart the connection after it was previously connected to the serial monitor console.
You will have noticed that the code only runs once and then stops. What about if you want to keep sending and receiving information between the Raspberry Pi and the Arduino? In that case we just need to wrap the Python code in a loop and perhaps add a delay to pause between each run. The code for the Raspberry Pi is provided below:
#!/usr/bin/python3


import serial

import time


ser = serial.Serial('/dev/ttyACM0', 9600, timeout=5)


# read from Arduino

input = ser.read()

print ("Read input " + input.decode("utf-8") + " from Arduino")


while 1:

        # write something back

        ser.write(b'A')


        # read response back from Arduino

        for i in range (0,3):

                input = ser.read()

                input_number = ord(input)

                print ("Read input back: " + str(input_number))


        time.sleep(1)
This is simple code that sends and receives data betweeen a Raspberry Pi and Arduino. The code can be modified on both the Raspberry Pi and Arduino to perform any additional operations and send appropriate data.
Please view the copyright information regarding use of the circuits.

